
Have you ever had a dessert so refreshing it feels like biting into a ray of sunshine? That’s exactly what pink grapefruit dessert bars deliver—a delicious blend of tangy and sweet with just the right amount of zest to make your taste buds sing. If you’re a fan of citrusy treats or just looking for something unique to bake, you’re in for a real treat.
What You’ll Learn:
What Are Pink Grapefruit Dessert Bars?
Pink grapefruit dessert bars are like a fun twist on the classic lemon bars everyone loves. Instead of the sharp tang of lemons, these bars use the mellow sweetness of pink grapefruit. The result? A dessert that’s less tart but still packs a punch of flavor. Picture a creamy filling with a buttery crust and a natural pink hue that makes them look just as good as they taste.
“Pink grapefruit dessert bars are like the sunshine of the dessert world—bright, vibrant, and full of energy!”
The Unique Appeal of Pink Grapefruit
So, what’s the big deal about pink grapefruit? It’s not just its color—though that rosy hue is undeniably gorgeous. Pink grapefruit is slightly sweeter than its yellow counterpart, with a hint of bitterness that balances its flavor perfectly. That makes it an amazing choice for desserts where you want sweetness without overwhelming the palate.
Here are a few reasons pink grapefruit stands out:
- Color: Its natural pink shade adds beauty to your dessert without needing food coloring.
- Flavor: The perfect mix of sweet, tangy, and bitter notes makes it versatile for sweet recipes.
- Nutrition: Loaded with Vitamin C and antioxidants like lycopene, it’s a healthier pick for desserts.
Why Dessert Bars Are a Favorite for All Ages
Why do dessert bars, including pink grapefruit ones, hold such a special place in people’s hearts? It’s simple—they’re versatile, easy to make, and perfect for every occasion. From picnics to fancy dinner parties, dessert bars are the ultimate crowd-pleasers.
“Dessert bars are like the Swiss army knife of baking—simple yet adaptable for any event.”
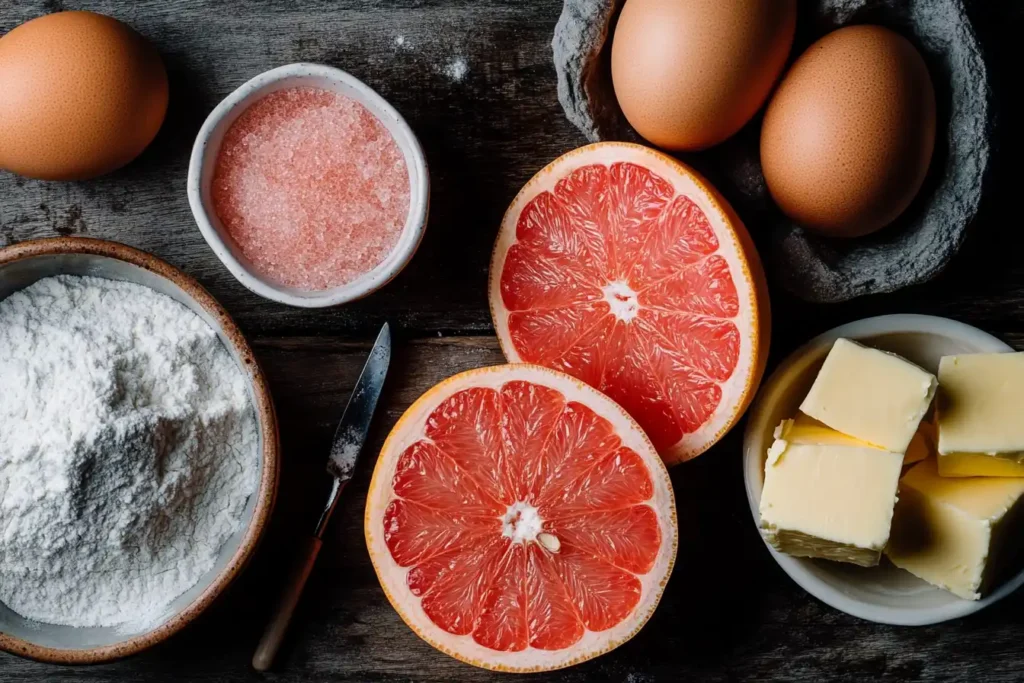
Ingredients for Perfect Pink Grapefruit Dessert Bars
To whip up a batch of these delicious bars, you’ll need a few simple ingredients. Most of them are pantry staples, so you probably already have them on hand.
| Ingredient | Quantity |
|---|---|
| All-purpose flour | 1 ½ cups |
| Unsalted butter (cold) | ¾ cup |
| Granulated sugar | ½ cup (for crust) + 1 cup (for filling) |
| Freshly squeezed pink grapefruit juice | ¾ cup |
| Pink grapefruit zest | 1 tablespoon |
| Eggs | 4 large |
| Cornstarch | 2 tablespoons |
| Powdered sugar | For dusting |
“Freshly squeezed pink grapefruit juice makes all the difference—trust me on this one!”
Substitutions and Variations for Dietary Preferences
Want to make these bars fit your dietary needs? No problem! Here are some simple swaps you can try:
- Vegan: Replace butter with coconut oil and use aquafaba (chickpea water) instead of eggs.
- Gluten-Free: Swap the all-purpose flour for almond flour or a gluten-free baking mix.
- Low-Sugar: Substitute granulated sugar with a natural sweetener like monk fruit or stevia.
How to Make Pink Grapefruit Dessert Bars at Home
Making pink grapefruit dessert bars at home is a rewarding and surprisingly simple process. Whether you’re an experienced baker or just starting out, this recipe is easy to follow and delivers spectacular results. The key is to focus on the balance between the buttery crust and the zesty filling. Let’s break it down step by step:
Step 1: Gather Your Ingredients
Before you begin, make sure you have all your ingredients measured and ready. Here’s what you’ll need:
| Ingredient | Quantity |
|---|---|
| All-purpose flour | 1 ½ cups |
| Unsalted butter (cold) | ¾ cup |
| Granulated sugar | ½ cup (for crust) + 1 cup (for filling) |
| Freshly squeezed pink grapefruit juice | ¾ cup |
| Pink grapefruit zest | 1 tablespoon |
| Eggs | 4 large |
| Cornstarch | 2 tablespoons |
| Powdered sugar | For dusting |
“Always use freshly squeezed grapefruit juice for the best flavor. The bottled version just can’t compete with fresh!”
Step 2: Prepare the Crust
The crust is the foundation of your dessert bars, so it’s important to get it right. Follow these steps to make a buttery, melt-in-your-mouth base:
- Preheat your oven to 350°F (175°C) and line an 8×8-inch baking pan with parchment paper. This will make it easier to lift the bars out later.
- In a mixing bowl, combine the flour, cold butter (cut into small cubes), and granulated sugar. Use a pastry cutter or your fingers to work the butter into the dry ingredients until the mixture resembles coarse crumbs.
- Press the crust mixture evenly into the bottom of the prepared baking pan. Use the back of a spoon or the flat side of a measuring cup to ensure the crust is tightly packed and level.
- Bake the crust for 15–20 minutes, or until it turns a light golden brown. Remove from the oven and let it cool slightly while you prepare the filling.
Step 3: Make the Filling
The filling is the star of the show, combining the sweet and tangy flavors of pink grapefruit into a smooth, custardy layer. Here’s how to make it:
- In a medium-sized bowl, whisk together the eggs and granulated sugar until the mixture is smooth and slightly frothy.
- Slowly add the pink grapefruit juice and zest to the egg mixture, whisking continuously. This ensures the filling is well blended and free of lumps.
- Sift in the cornstarch to prevent clumps and whisk until fully incorporated. The cornstarch will help the filling set and achieve the perfect creamy texture.
- Pour the filling over the pre-baked crust, spreading it evenly to the edges.
Step 4: Bake the Dessert Bars
Once the filling is poured over the crust, it’s time to bake everything together:
- Place the baking pan back into the oven and bake for 20–25 minutes, or until the filling is set. The edges should be firm, but the center can remain slightly jiggly—it will firm up as it cools.
- Remove the pan from the oven and let it cool to room temperature on a wire rack. Once cooled, transfer the pan to the refrigerator and chill for at least 2 hours to fully set the filling.
“Patience is key! Letting the bars chill ensures they cut cleanly and hold their shape.”
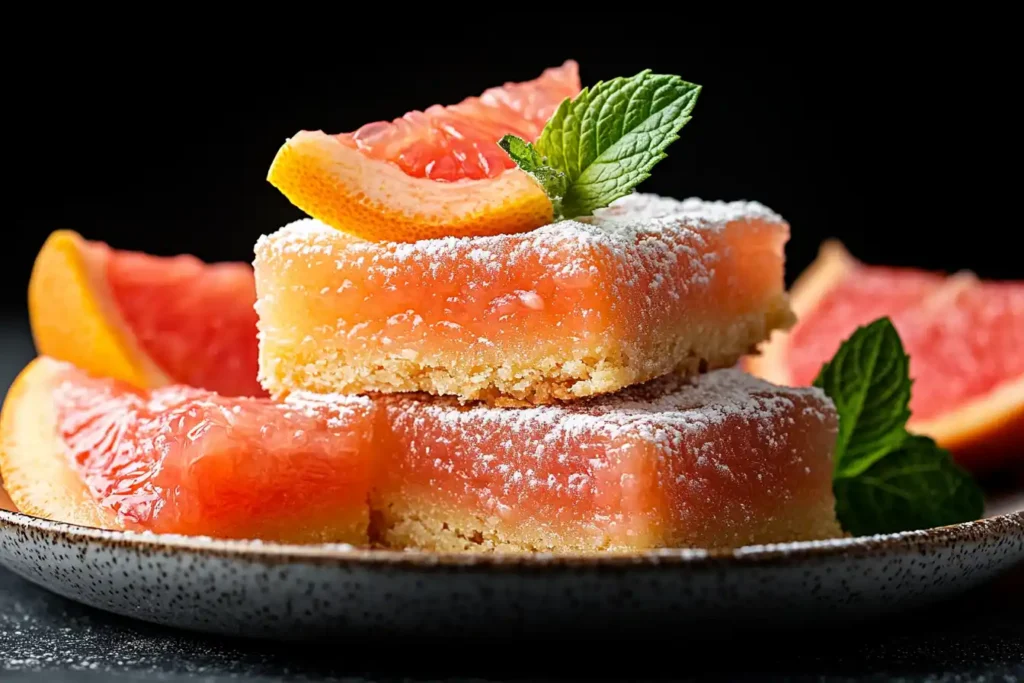
Step 5: Slice, Garnish, and Serve
The final step is all about presentation and enjoying your hard work:
- Carefully lift the bars out of the pan using the parchment paper as handles. Place them on a cutting board.
- Use a sharp knife to cut the dessert into squares or rectangles, wiping the knife clean between cuts for neat edges.
- Dust the tops of the bars with powdered sugar for a classic look. For extra flair, garnish with thin slices of pink grapefruit or fresh mint leaves.
- Serve the bars chilled or at room temperature. They’re perfect as an afternoon snack, a party treat, or a post-dinner dessert.
Pro Tip: Storing Your Dessert Bars
Any leftovers can be stored in an airtight container in the refrigerator for up to 5 days. If you’d like to keep them longer, wrap individual bars in plastic wrap and freeze them for up to 3 months. Just thaw them in the fridge overnight before serving.
Pro Tips for the Best Pink Grapefruit Dessert Bars
Want to make your pink grapefruit dessert bars truly unforgettable? These pro tips will help you nail the recipe every time:
- Use Fresh Grapefruit: Freshly squeezed juice gives the filling a vibrant, tangy flavor that bottled juice just can’t match.
- Don’t Skip the Zest: The zest adds a concentrated citrusy aroma and flavor that takes your bars to the next level.
- Chill the Butter: When making the crust, cold butter ensures a tender, crumbly base. Soft butter won’t give you the same texture.
“Think of the crust as the canvas and the filling as your masterpiece. Both need a little finesse to shine!”
Creative Variations of Pink Grapefruit Dessert Bars
Why stick to the classic version when you can get creative? Here are some fun twists to try:
Adding a Chocolate Twist
Love chocolate? Melt some white or dark chocolate and drizzle it over the cooled bars for a decadent finish. You can even add cocoa powder to the crust for a subtle chocolate flavor.
Pairing with Coconut for a Tropical Flavor
For a tropical vibe, mix shredded coconut into the crust or sprinkle toasted coconut flakes on top of the filling before baking. The coconut pairs beautifully with the grapefruit’s tangy sweetness.
Experimenting with Nuts and Seeds
Add a crunchy element by mixing chopped nuts like pistachios or almonds into the crust. You could also sprinkle sesame or chia seeds over the filling before it sets for a unique texture and flavor.
Common Problems and Solutions When Making Dessert Bars
Even experienced bakers can encounter hiccups. Here’s how to solve some of the most common issues:
Why Do Dessert Bars Turn Out Soggy?
Problem: The crust or filling is soggy instead of firm.
Why It Happens: Either the crust wasn’t baked long enough, or the filling was too liquidy.
Fix It:
- Pre-bake the crust until it’s golden and firm before adding the filling.
- Don’t overmix the filling—it should be thick and smooth.
How to Perfect the Crust Every Time
Problem: The crust crumbles when cut or served.
Why It Happens: The crust mixture wasn’t pressed down firmly or wasn’t chilled properly.
Fix It:
- Press the crust mixture firmly into the pan to create a compact base.
- Use cold butter and chill the crust briefly before baking.
Achieving the Right Balance of Sweetness and Tartness
Problem: The filling is either too sour or overly sweet.
Why It Happens: The sugar-to-juice ratio wasn’t right, or the grapefruit juice was too concentrated.
Fix It:
- Add a pinch of salt to balance overly sweet or sour flavors.
- Taste-test your filling before baking and adjust the sugar as needed.
Serving and Storing Pink Grapefruit Dessert Bars
These dessert bars are not just for after-dinner treats—they’re a versatile option that can even double as a bright, citrusy addition to your breakfast spread. Pair them with your morning coffee or tea for a refreshing start to the day. For more breakfast inspiration, explore sweet breakfast ideas for a perfect start to your day.
Once your bars are baked and ready, the fun part begins—serving them! Here’s how to make the most of this delicious dessert:
Presentation Ideas to Wow Your Guests
Turn your dessert bars into a showstopper by garnishing with thin grapefruit slices, fresh mint leaves, or a light dusting of powdered sugar. For an elegant touch, serve them on a cake stand or a decorative platter.
“Presentation is like the bow on a gift—it’s the first thing people notice, so make it count!”
Proper Storage to Keep Them Fresh
Here’s how to store your leftover bars (if there are any!):
- In the Fridge: Store in an airtight container for up to 5 days. Let them come to room temperature before serving.
- In the Freezer: Wrap individual bars in plastic wrap and place them in a freezer-safe container. They’ll stay fresh for up to 3 months. Thaw in the fridge overnight.
Frequently Asked Questions About Pink Grapefruit Dessert Bars
Can I Use Other Citrus Fruits Instead of Grapefruit?
Yes, you can definitely experiment with other citrus fruits! Lemon, lime, or even blood orange juice are excellent substitutes. However, keep in mind that each fruit brings its own flavor profile:
- Lemons: More tart and sharp, perfect if you prefer a stronger tang.
- Limes: Zesty with a slight bitterness, great for a tropical twist.
- Blood Oranges: Sweeter with a beautiful deep red hue, ideal for visual appeal and a mild flavor.
“Feel free to mix and match! A blend of grapefruit and orange juice can create a unique and layered flavor.”
How Long Do Pink Grapefruit Dessert Bars Last?
Pink grapefruit dessert bars are surprisingly durable if stored correctly. Here’s how long you can keep them:
- In the Fridge: Store in an airtight container for up to 5 days. They taste best when chilled, so you can serve them straight from the refrigerator.
- In the Freezer: If you want to store them longer, wrap individual bars in plastic wrap and place them in a freezer-safe container. They can be frozen for up to 3 months. To enjoy, simply thaw them in the fridge overnight before serving.
“Pro tip: Freeze leftover bars in small batches so you can thaw just what you need for a quick treat!”
Are Pink Grapefruit Dessert Bars Kid-Friendly?
Absolutely! Most kids enjoy the sweet and tangy flavor of these bars. However, if your grapefruit is on the bitter side, consider adding a bit more sugar to the filling to balance it out.
To make the bars extra fun for younger kids, you can:
- Use cookie cutters to create fun shapes like stars or hearts.
- Add a drizzle of white chocolate or a sprinkle of colorful sugar crystals on top.
“Kids love desserts with a pop of color and a fun presentation—let them help with the garnishing for a hands-on experience!”
What If I Don’t Have a Zester for the Grapefruit?
If you don’t have a zester, don’t worry! Here are a couple of alternatives:
- Use a vegetable peeler to remove the outermost layer of the grapefruit’s skin (avoid the white pith). Then, finely chop the peels with a knife.
- A fine grater can also work, though you’ll need to use gentle pressure to avoid over-grating.
Grapefruit zest is important because it adds an extra punch of flavor to your dessert, so it’s worth including even if you have to get creative!
Can I Make These Bars Vegan or Gluten-Free?
Yes, you can easily adapt this recipe to fit vegan or gluten-free diets. Here’s how:
- Vegan Version: Use a plant-based butter substitute and replace the eggs with a flaxseed mixture (1 tablespoon flaxseed + 3 tablespoons water = 1 egg).
- Gluten-Free Version: Swap the all-purpose flour for almond flour or a gluten-free baking mix. Just ensure the mix includes xanthan gum for binding.
“Customizing your dessert bars for dietary needs doesn’t have to be tricky—these easy swaps work like a charm!”
Can I Double the Recipe for a Larger Batch?
Absolutely! If you’re baking for a crowd, you can double the recipe and bake it in a 9×13-inch pan instead of an 8×8-inch pan. Keep in mind that the baking time might increase slightly, so check for doneness by ensuring the filling is set and no longer jiggly in the center.
“Double the recipe, double the joy—these bars are always a hit at gatherings!”
Conclusion: Why Pink Grapefruit Dessert Bars Deserve a Spot on Your Table
Pink grapefruit dessert bars are a delightful combination of tangy, sweet, and refreshing flavors that are sure to brighten up any occasion. They’re easy to make, versatile enough for creative twists, and perfect for both casual get-togethers and fancy gatherings. Whether you’re a citrus lover or just looking for a dessert that’s a little different, these bars are a must-try.
So grab some fresh pink grapefruits, roll up your sleeves, and get baking. Your taste buds (and your friends and family) will thank you!